Add and Update Stacks
In this section, you will learn how to add and update Stacks in Workspaces and configure Context.
Prerequisite
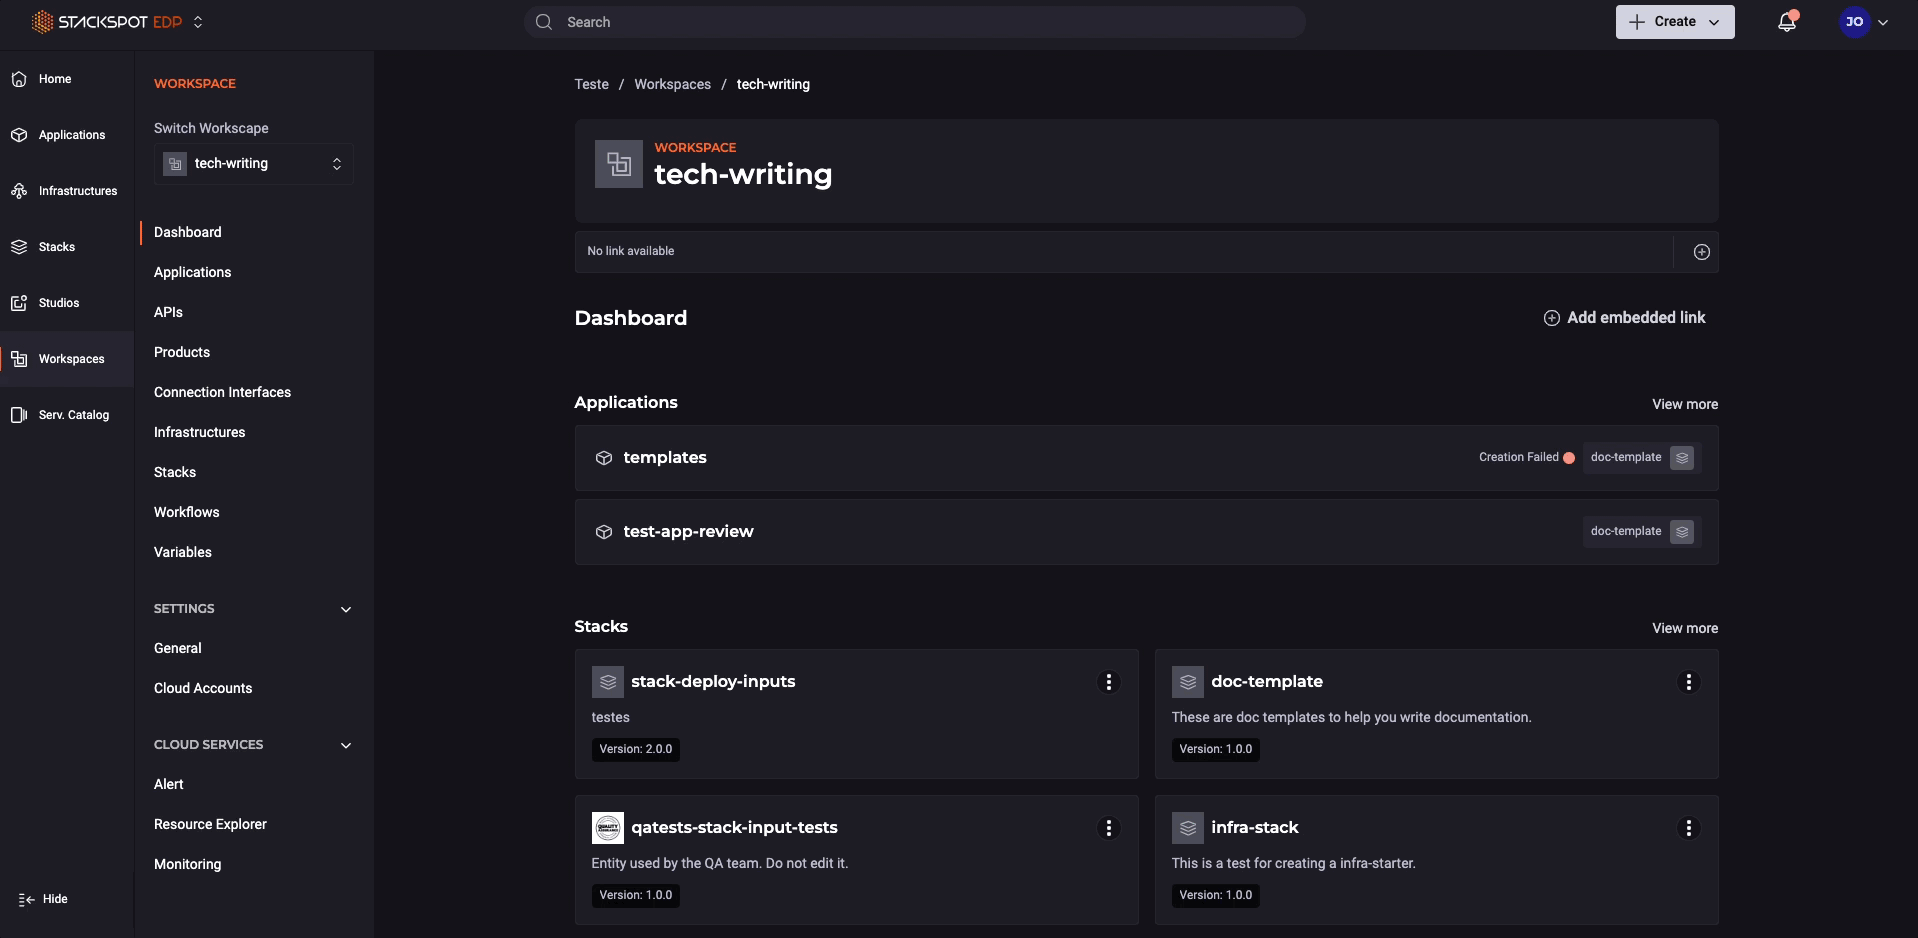
Add a Stack to a Workspace
Follow the steps below to add a Stack to your Workspace:
-
Log in to your Account and click the 'Workspaces' button.
-
Access your Workspace and click 'Stacks' in the main menu.
-
Click 'Add Stacks' to add your first Stack.
-
A list of available Stacks in your Account is displayed. Select the Stacks you want to add to your Workspace.
tipYou can search for Stacks by filtering them by name or Studio.
dangerIf the Stack you want to add is in a Studio with restricted visibility, it will not appear in your Workspace. If this happens, contact the Studio manager to check if the visibility can be adjusted.
-
After selecting the desired Stacks, click the 'Add Stacks' button.
infoIf you do not have a published Stack yet, follow the steps to Create a Stack.
See the steps in the GIF:
Update a Stack Version in a Workspace
You can update the Stacks in your Workspace when at least one of them has a new version available. Follow the steps below:
- Log in to your Account and click the 'Access Workspaces' button.
- Access your Workspace and click 'Stacks' in the main menu.
- A window appears, showing which Stacks will be updated and their new versions. Click 'Update Versions'.
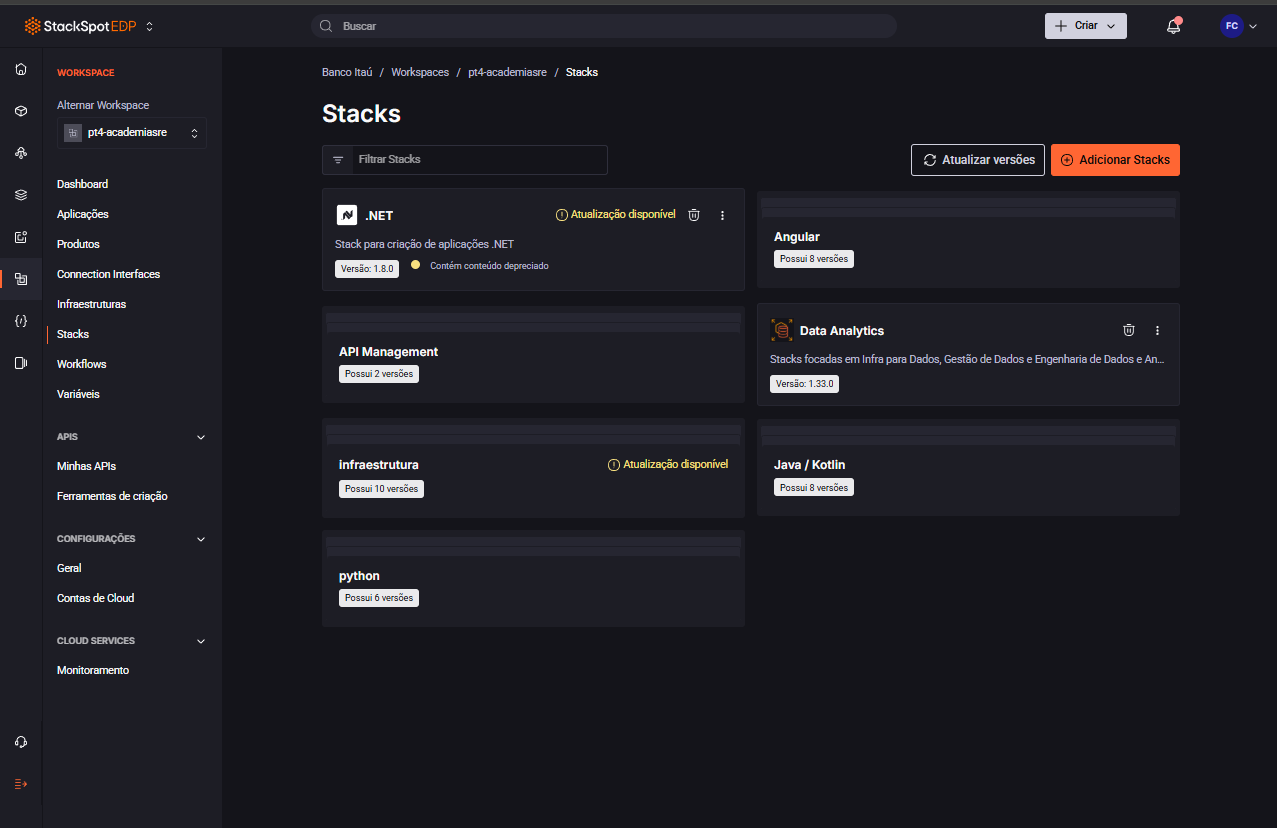
You successfully updated the Stack version in your Workspace.
More details:
See a detailed explanation about updating a Stack
Consider the following scenario: "How do I update a Java/Kotlin Plugin in the Stack from version 1.x.x to 2.x.x?"
First, make sure to review the Stack versioning rules.
In this specific scenario, the Stack version does not impact your project. You need to make sure your Stack is updated in your Workspace. After that, you can update the Plugin versions.
In other words, the Stack version in your stk.yaml file does not change from the initial version (when the project was created). Once the Stack is updated in the Workspace, you can access the Plugins in their latest published versions.
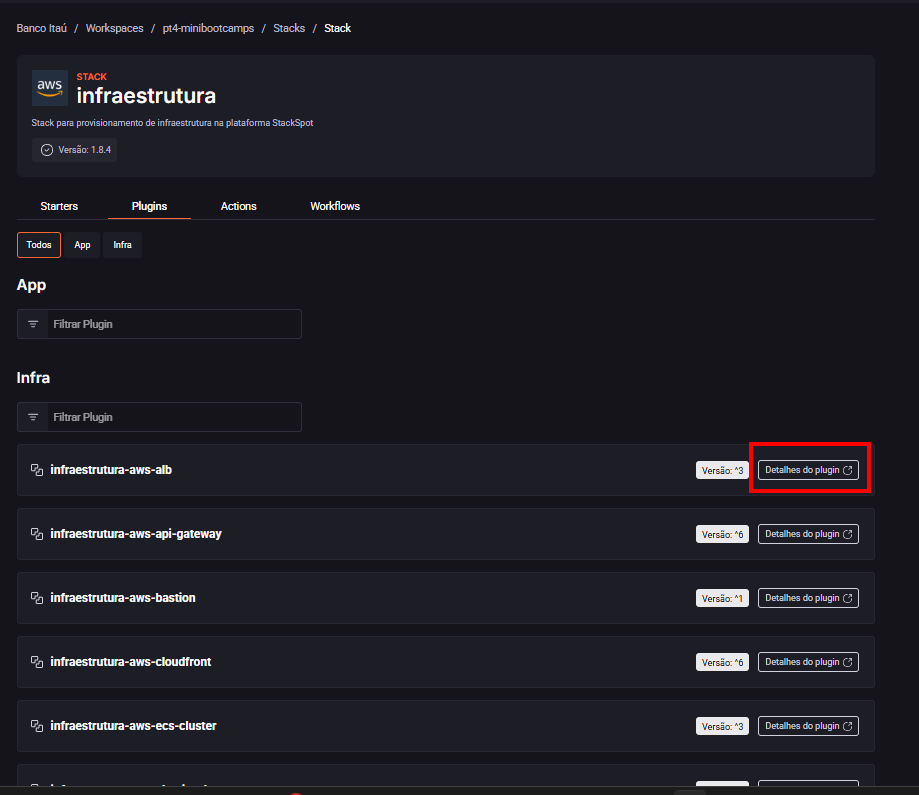
Another tip is to use the Stacks to find the full path of the Plugin. Follow the steps below:
- Access the Infrastructure Stack;
- Find the Plugin you want to update;
- Click the 'Plugin details' button;
- Open your terminal and run the
stk update plugincommand; - Select the Plugin you want to update and enter the latest Plugin version, for example:
qf4-infraestrutura/infraestrutura-aws-lambda@6.0.2.
Done. You updated the Plugin version in a Stack.