Configure a Workflow (Deprecated)
In this section, you will find the steps for configuring Workflow in an Account.
This content is deprecated. Learn about the new StackSpot Workflow.
What is Workflow
You can set up Workflows in your Account. They define the order in which Actions are executed based on activities the developer executes in the StackSpot Portal, for example, Create App or Create Infra. In other words, a Workflow defines the Actions that precede and succeed in the execution of each of these processes.
Actions are a framework that provides intelligence for scripts to execute automation. They can be used to automate and streamline bureaucratic processes within your organization.
You can create your own Actions, publish them, and distribute them throughout your organization to ensure consistency in automation processes. By configuring Workflows, you define the sequence of these automation.
You can configure Workflows for the following processes:
- Create App;
- Create Infra; and
- Create API.
When a developer uses a Stack to create an Application, the Stack's Workflow determines the Actions that will be executed.
At StackSpot, you can configure default Workflows for your entire Account, ensuring that all created Stacks adhere to them.
You also have the option to configure Workflows for specific Stacks, allowing them to operate independently from the account's default Workflow.
- It is not possible to configure a default Workflow for
Create API; - The Actions that make up the Workflow do not need to link to specific Stacks; they must be part of any Studio with visibility set for the entire account.
Next, check out how to configure a Workflow:
Prerequisites
Configure a Workflow
In this documentation, you'll often see the term "Configure Context".
When you set up a Context for your Workflow, you're basically choosing values for the input Actions in that Workflow. These values will be the same for everyone using the Workflow, whether they're mandatory or just suggested.
You can set Workflow contexts at three levels:
- Account;
- Stack in the Account;
- Stack in the Workspace.
So, if you make a certain input mandatory for an Action in your Workflow, all Stacks and Workspaces using this Workflow will need to follow that rule. But, inputs not marked as mandatory can still be changed.
If someone sets a Workflow input as mandatory in a specific Stack, the Workspace using it can't change it. And if the Workspace Administrator sets another input as mandatory, everyone in the Workspace must use all mandatory inputs from the Account, Stack, and Workspace without changing them.
Learn more:
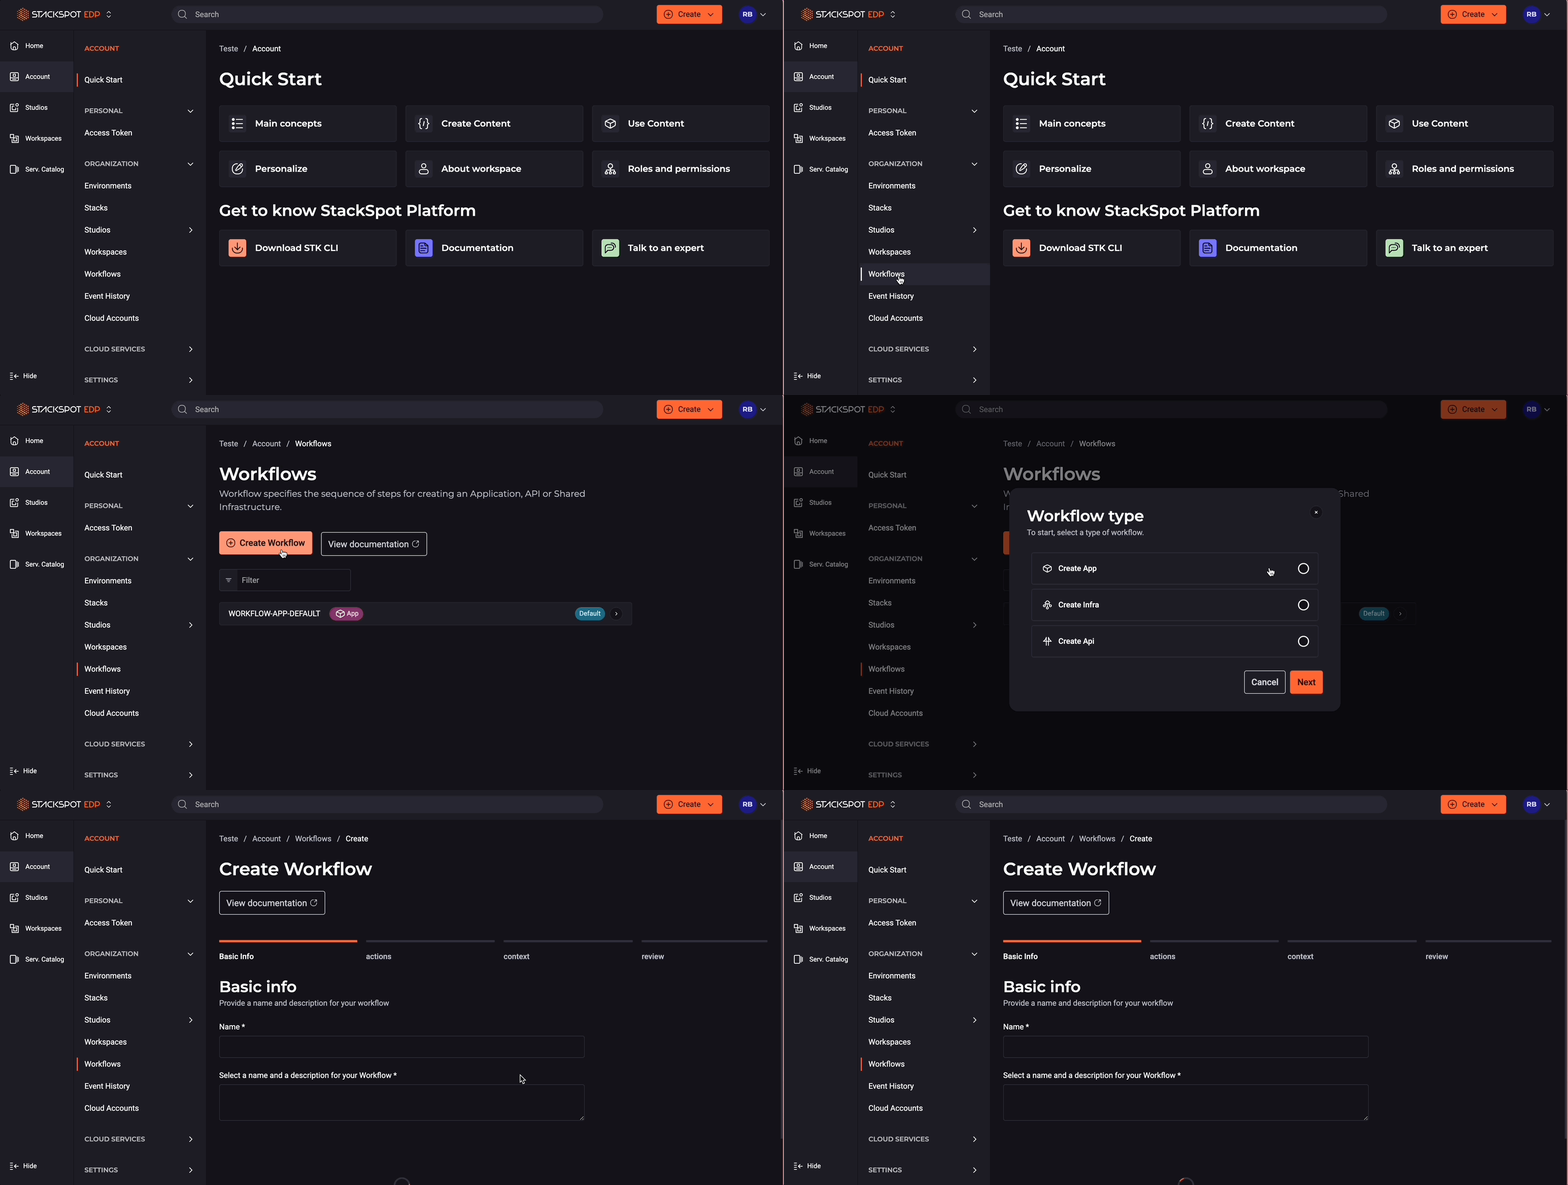
Step 1. Go directly to the Account Portal; or after logging into the StackSpot Portal, click on your profile avatar.
Step 2. Select the 'Organization' option from the displayed menu;
Step 3. In the Account Portal main menu, select the StackSpot EDP product and click on 'Workflow';
Step 4. Click the 'Create Workflow' button and select the type of Workflow you want:
Create App;Create Shared Infra; orCreate API.
Refer to the GIF below:

Step 5. In the 'Basic Information' section, provide the following details:
- Name: Name of the Workflow, for example, Default Workflow 1;
- Description: Write a brief description of your Workflow;
Step 6. Still in 'Basic Information', choose one of the following options:
- Apply this Workflow as the default for all Stacks: This Workflow will become the norm for all Stacks created in your Account.
- Apply this Workflow to specific Stacks: This Workflow will apply only to the Stacks you select at this stage. To choose the Stacks, click on 'Add Stacks'.
- Selecting a Stack with an existing Workflow will cause the new Workflow to overwrite it.
- You can later associate this Workflow with other Stacks if necessary.
Click 'Next'.
Step 7. In 'Actions' select the Actions to include in your Workflow:
- Before: Actions executed at the start of the Workflow, such as
Create repo. Click 'Add Actions' and select your desired Actions - After: Actions executed at the end of the Workflow, such as
Git PublishorRegister in Service Now. Click 'Add Actions' and select the ones you want.
The Actions in the Workflow do not need to be linked to specific Stacks. They only need to be part of any Studio with visibility set for the entire Account.
Step 8. In the 'Context' section, define the default values of the Actions' inputs across the account and set them as mandatory if required. You can configure the Context of these Actions at the Account level. To do this:
- Click on the Action you want to configure;
- Write the values for each input. Check the 'Mandatory' box to make a value mandatory. Otherwise, it will just be a suggestion.
Step 9. Repeat the process for all actions and click 'Next'.
That's it! You have finished configuring your Workflow. Check all the information on the Summary screen, and if you need to edit something, click the 'Edit'** button next to the specific section.