Create Infrastructure with Local Starter
In this section, you will find a guide on how to create your Infrastructure with a local Starter.
To create an Infrastructure you need to choose a Starter that contains the set of Plugins that you want to be applied when generating the Infrastructure. The Infrastructure can be created inside or outside a Workspace, but the Starter with Plugins must be published and available in a Studio on the StackSpot platform.
To facilitate the development and testing of Infrastructures, you can create your Starter locally and use published Plugins to create your Infrastructure. Before creating it with a local Starter, some observations are necessary:
-
When creating the Infrastructure, the local Starter will disregard the Workspace. Therefore, Infrastructures created with a local Starter cannot be registered or deployed on StackSpot.
-
The Starter file must be inside a Stack folder.
Generate local Starter structure
First, you need to access the Stack folder, if you don't have a Stack, [check out the section to create a Stack with the STK CLI](create-use/create-content/stack/create-stack-starter -cli.md)
Step 1. Create the Starter
Inside your Stack folder, run the command below and then fill in the Starter information.
stk create starter
Answer the questions on your terminal:
Name your starter: Enter a name for your Starter Type: Enter the Starter type, to create an Infrastructure choose the 'Infra' type. Do you want to start a git repository? Enter 'Y' to start a Git repository or 'N' to not start the Git repository.
Add remote? If you started the Git repository, answer 'Y' to add a remote repository or 'N' to not add the remote repository. Git URL to set as remote origin: add the URL of the remote repository. For example, a GitHub repository. Starter Description: Add a description for the Starter explaining its purpose.
Make sure the Starter name is added in your stack.yaml file.
Step 2. Add Plugins to Starter
Within the Stack, the starters folder is created, and within it the starter.yaml file. The structure created is similar to the example below:
schema-version: v1
kind: starter
metadata:
   name: local-starter-infra
   description: Describe your starter explaining its purpose
spec:
   type: below
   docs:
     en-us: docs/en_us/docs.md
     pt-br: docs/pt_br/docs.md
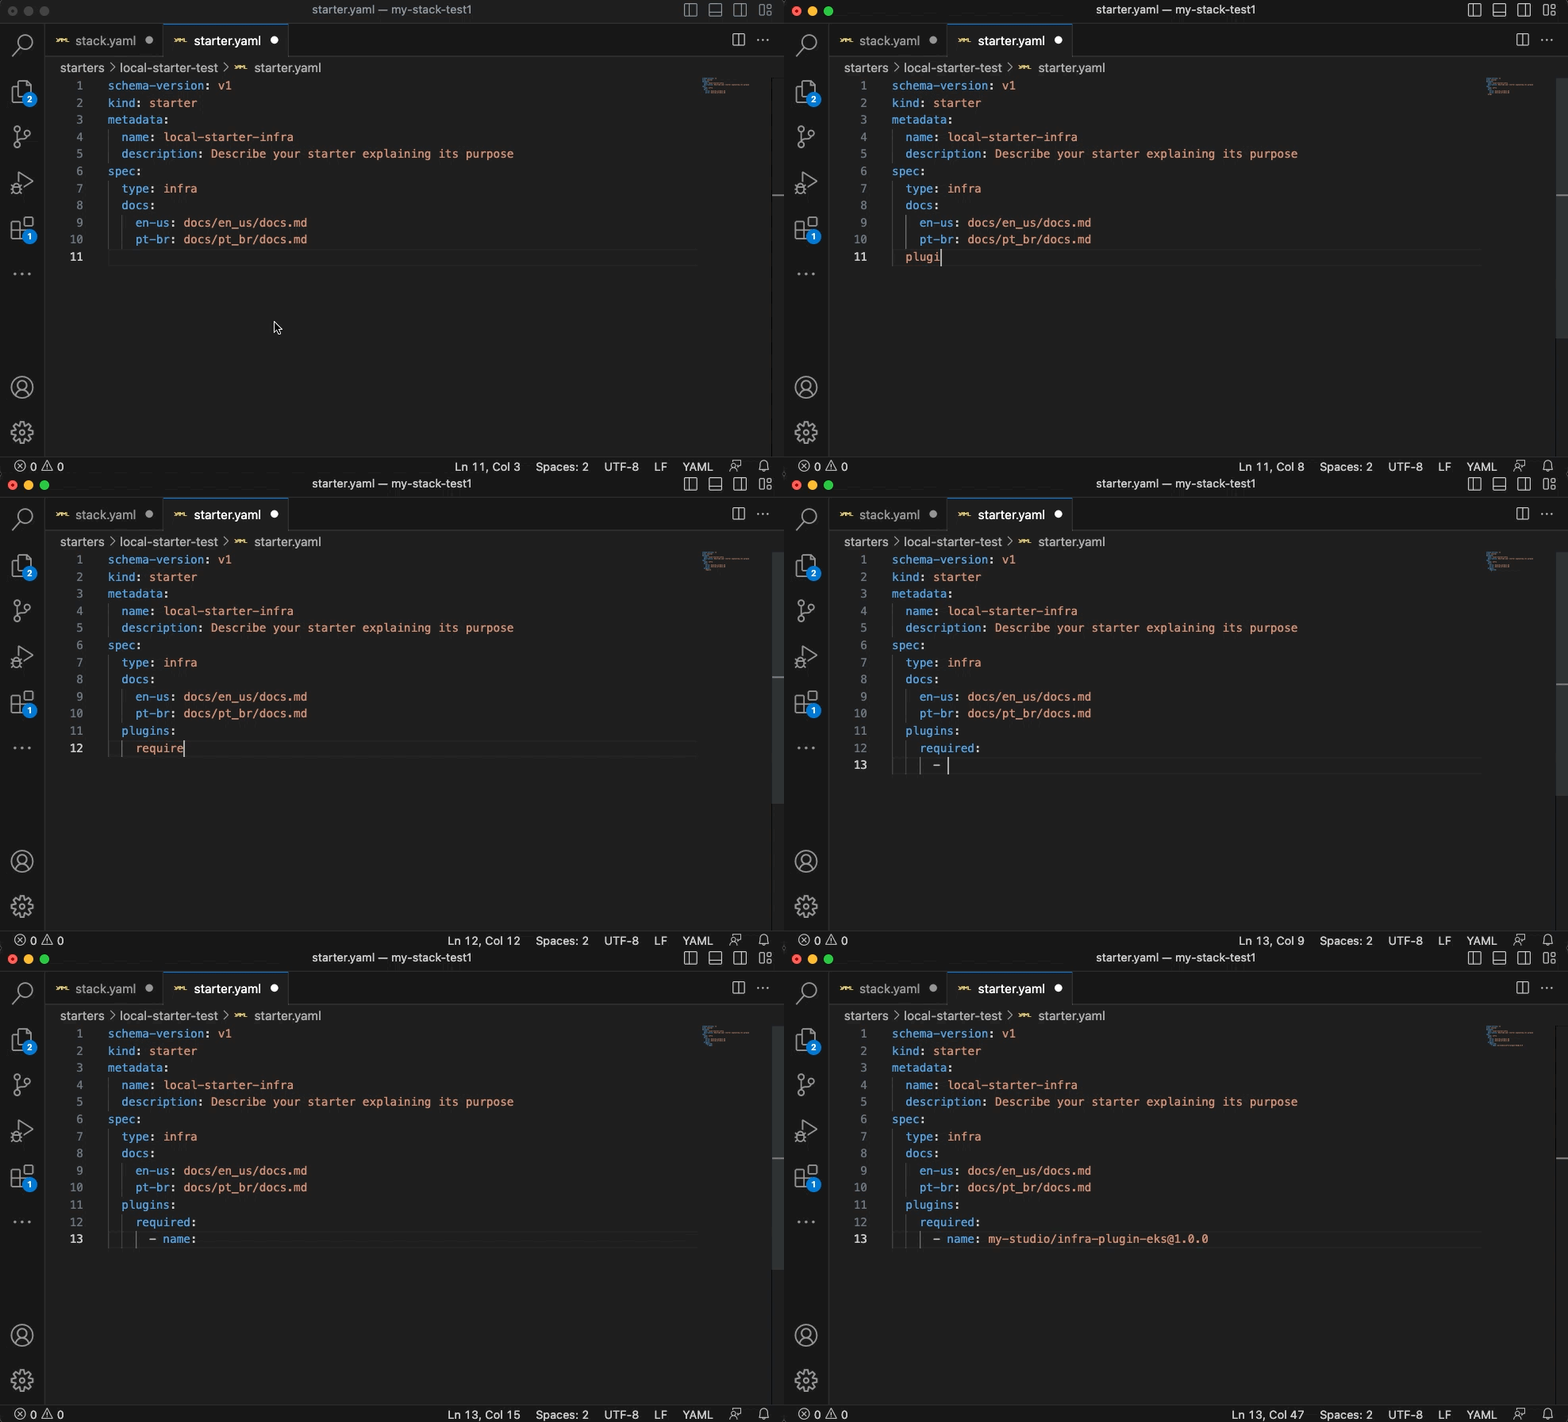
The Starter is minimally functional and you need to add the Plugins from the Studios you have access to. To add Plugins, use the following pattern and add the Plugins you want:
schema-version: v1
kind: starter
metadata:
   name: local-starter-infra
   description: Describe your starter explaining its purpose
spec:
   type: below
   docs:
     en-us: docs/en_us/docs.md
     pt-br: docs/pt_br/docs.md
   plugins:
     required:
       - name: studio-slug/<plugin-name>
     optional:
       - name: studio-slug/<plugin-name>
Check out the example below:

With the Stack and Starter ready, you can now move on to creating the Application.
Create Application with Local Starter
Run the command to create the Infrastructure using the option --starter, and add the full path of the Starter file:
The command below executes the creation of an Infrastructure with the name 'infra-with-local-starter'. It's just an example, you can enter whatever name you want.
The full Starter file path is just an example path. You must enter the full path of the Starter that you created in your Stack folder.
stk create app infra-with-local-starter --starter /User/Documents/Stacks/my-stack-test2/starters/starter.yaml
The Infrastructure will be created and the Plugins listed in the Starter will be applied. If desired, see the other options for creating an Infrastructure: